

Refinishing hardwood floors is a rewarding DIY project that can restore the natural beauty of wood, remove years of wear, and increase your home’s value. With proper preparation, the right sanding techniques, and a durable finish, even first-time DIYers can achieve professional-looking results without the cost of full floor replacement. Hardwood is a popular choice in many homes, but homeowners often compare it with other kitchen flooring materials and styles before deciding on a renovation project.
This guide is ideal for homeowners with solid hardwood floors that have surface scratches, fading, or worn finishes. DIY refinishing is a good option if you can handle rental tools and allow time for sanding and curing. However, floors with severe water damage, warped boards, or thin engineered hardwood are usually better suited for professional repair or replacement.
Refinishing Hardwood Floors — The Quick Answer:
To refinish hardwood floors, clear the room, repair damaged areas, sand using progressively finer grits, clean thoroughly, apply stain if desired, and seal with multiple coats of polyurethane. Proper dust control, ventilation, and adequate drying and curing time are essential for a smooth, durable, and long-lasting finish.
Hardwood Floor Refinishing at a Glance
| Factor | Details |
|---|---|
| Project Type | DIY or Professional |
| Total Time | 4–7 days (including curing) |
| Cost Range | $300–$1,000 (DIY) |
| Skill Level | Intermediate |
| Best Finish Options | Water-based or oil-based polyurethane |
| Lifespan After Refinishing | 7–15 years |
| Sanding Required | Yes (unless buff & recoat) |
Real-World Project Insight (Expert Experience)
“In pre-1980 homes, we frequently encounter uneven subfloors, hidden fasteners, and old finishes that generate heavy dust. Proper HEPA filtration and careful grit progression make the difference between a professional result and a ruined floor.”
— Daniel Moore, Certified Flooring & Renovation Specialist
Can Your Hardwood Floors Be Refinished?
Solid Hardwood
- Made from a single piece of wood
- Can be refinished multiple times
- Ideal for full sanding and refinishing
Engineered Hardwood
- Thin hardwood veneer over plywood
- Wear layer often less than 3/32 inch
- May allow only light buffing—or none
Pro Tip: Remove a floor vent or threshold to inspect plank thickness before sanding.
Before sanding, it’s important to understand the differences between engineered and traditional wood floors since refinishing options vary significantly. Link: Engineered Hardwood vs Solid Hardwood
Before You Start: Hardwood Floor Refinishing Checklist
- Confirm the floor is solid hardwood
- Ensure wear layer is at least 3/32 inch
- Fix loose boards and countersink nails
- Choose stain and finish in advance
- Rent sanding and dust-control equipment
- Plan drying and curing time
- Arrange temporary furniture relocation
Reviewing the typical expenses involved in hardwood flooring projects can help you budget accurately before renting equipment and buying materials. Link: Hardwood Flooring Cost Guide
Time, Cost, and Difficulty Breakdown
1) Time Required
- Preparation & sanding: 1–2 days
- Staining & sealing: 1–2 days
- Curing before furniture: 2–3 days
2) Estimated DIY Cost
- Small room: $300–$500
- Medium home: $500–$1,000
3) Difficulty Level
- Skill: Intermediate
- Physical effort: High
- Precision required: High
Beginners can succeed by working slowly and respecting grit progression and drying times.
Tools & Materials Required
Materials
- Drum sandpaper (36, 60, 100 grit)
- Edge sandpaper
- Wood filler or putty
- Tack cloths
- Polyurethane or wood oil finish
- Plastic sheeting
Tools
- Drum or belt sander
- Edge sander
- Floor buffer with screening pad
- Shop vacuum with HEPA filter
- Paint roller with extension pole
- 3-inch paint brush
- Safety goggles, respirator, ear protection
Rent or Buy? Tool Cost Insight
| Tool | Rent (Per Day) | Buy |
|---|---|---|
| Drum/Belt Sander | $50–$75 | $800+ |
| Edge Sander | $30–$50 | $300+ |
| Floor Buffer | $40–$60 | $600+ |
Preparing the Floor for Refinishing
1) Clear the Room
Remove all furniture, rugs, doors, and base moulding. Seal doorways and vents with plastic sheeting.
2) Inspect and Repair
Fill cracks, gaps, and nail holes. Secure loose boards and countersink protruding nails.
3) Deep Clean
Vacuum thoroughly before sanding.
Common Mistake: Skipping repairs leads to visible defects after finishing.
Homeowners working with pine boards should be aware that restoring softwood flooring surfaces often requires a slightly different approach. Link: Refinishing Pine Floors
Sanding the Hardwood Floor (Step-by-Step)
Sanding removes old finish and surface imperfections.
1) Grit Progression (Critical)
-
36-grit: Removes old finish
-
60-grit: Refines scratches
-
100-grit: Smooths surface
Skipping grits will leave permanent sanding marks.
2) Sanding Technique
-
Move parallel to the grain
-
Overlap passes by 50%
-
Keep the sander moving
-
Lift the drum before stopping
3) Edges and Corners
Use an edge or palm sander and follow the same grit sequence.
Cleanliness Check: Vacuum between every grit change.
Proper grit progression becomes even more important when refinishing softer wood species that can scratch more easily. Link: Refinishing Pine Floors
Cleaning, Screening, and Prep for Finish
After sanding:
-
Vacuum thoroughly
-
Wipe with tack cloths
-
Screen using a buffer and fine pad
-
Clean again
This step ensures flawless finish adhesion.
Staining and Sealing
1) Staining
-
Test stain in a hidden area
-
Apply evenly
-
Wipe excess immediately
-
Allow full drying time
2) Sealing
Apply sanding sealer if recommended by the finish manufacturer.
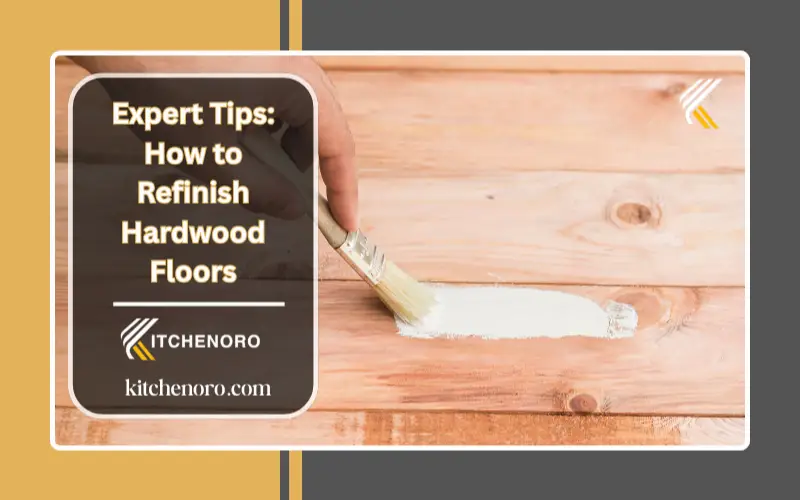
Applying the Finish
1) Choosing the Right Finish
-
Oil-based polyurethane: Maximum durability, warm tone
-
Water-based polyurethane: Fast drying, low odor
-
Wood oils: Natural appearance, moderate protection
2) Application Process
-
Apply along the grain
-
Use a lamb’s wool applicator or roller
-
Lightly sand between coats with 220-grit
-
Apply 3 coats (oil-based) or 4 coats (water-based)
Dry Time Reminder: Rushing coats causes bubbles and a soft finish.
Once the project is complete, following proven care practices for newly restored wood floors helps preserve the finish longer. Link: Hardwood Floor Maintenance Tips
Drying, Curing, and Climate Control
Warning: Walking on floors before full curing can permanently damage the finish.
1) Drying Times
-
Oil-based: 72 hours before light use
-
Water-based: 48 hours
-
Full cure: 7–10 days
2) Ideal Conditions
-
Temperature: 65–75°F (18–24°C)
-
Humidity: 40–55%
Long-term performance depends not only on refinishing quality but also on proper hardwood floor care routines after installation. Link: Hardwood Floor Maintenance Tips
When Can You Walk, Move Furniture, and Use Rugs?
| Activity | Safe Timing |
|---|---|
| Socks only | 24–48 hours |
| Light foot traffic | 48–72 hours |
| Furniture (felt pads) | 5–7 days |
| Area rugs | 10–14 days |
Buffing & Recoating vs Full Refinishing
1) Buff & Recoat Works If:
-
Finish is worn but wood isn’t exposed
-
No deep scratches or stains
-
Floor color remains unchanged
2) Full Refinishing Required If:
-
Bare wood is visible
-
Stains penetrate the wood
-
Boards are uneven or deeply scratched
Common Mistakes to Avoid
- Skipping grit levels
- Sanding against the grain
- Applying the finish too thick
- Ignoring dust between coats
- Rushing drying or curing time
Troubleshooting Common Refinishing Problems
| Problem | Likely Cause | Fix |
|---|---|---|
| Swirl marks | Skipped grit | Re-sand correctly |
| Bubbles | Over-rolling | Sand lightly & recoat |
| Uneven color | Poor stain wiping | Reapply evenly |
| Rough texture | Dust contamination | Screen & recoat |
When You Should NOT Refinish Hardwood Floors
Do not refinish if:
-
Wear layer is below 3/32 inch
-
Boards are severely warped or cupped
-
Subfloor is water-damaged
-
Flooring is thin engineered hardwood
Professional evaluation or replacement is recommended.
DIY vs Professional Refinishing
1) DIY Refinishing
-
Lower cost
-
Full material control
-
Labor-intensive
2) Professional Refinishing
-
Faster turnaround
-
Advanced dust containment
-
Best for severe damage or thin floors
If refinishing is no longer practical, exploring other durable flooring options for kitchens and homes may be the better solution.
Safety & Environmental Considerations
Safety Essentials at a Glance
-
Wear respirator, goggles, ear protection
-
Ventilate continuously
-
Cover HVAC vents
-
Dry oil-soaked rags outdoors
-
Keep pets and children away
Choose low-VOC or water-based finishes for indoor air quality.
Maintenance After Refinishing
-
Use microfiber mops only
-
Avoid wet mopping
-
Clean spills immediately
-
Use felt pads under furniture
-
Recoat every 3–5 years
FAQs
1-Can I refinish my hardwood floors myself?
Yes, you can refinish your hardwood floors yourself. If the damage is minor, such as scratches or dullness, this DIY project can be manageable and rewarding. By sanding the surface, you can restore the appearance and enhance the look of your floors. Applying a fresh coat of varnish or finish will preserve the wood and add a new shine, making it a cost-effective way to save money while achieving a complete makeover
2-Can wood floors be refinished without sanding?
Yes, hardwood floors can be refinished without sanding by using methods like buffing, recoating, or chemical abrasion. These techniques involve lightly abrading the existing finish and applying an adhesion promoter to ensure the new topcoat bonds effectively. It’s a quick and easy way to refresh your floors without the hassle of sanding.
3-What not to do when refinishing hardwood floors?
Avoid applying too much pressure when sanding, as it can cause an uneven surface. Always use a consistent, steady back-and-forth motion to prevent scratches and damage. Never sand cross-grain; this can result in deep marks and harm the wood and its fibres. Follow the grain to ensure a smooth, flawless finish.
4-What is the best thing to use to refinish hardwood floors?
When refinishing hardwood floors, homeowners in the US often choose between water-based or oil-based polyurethane finishes. Water-based finishes dry quickly and are easier to apply, but they may require more coats.
They offer good protection against scuffs and water damage. On the other hand, oil-based finishes provide stronger protection but can be tricky to apply and take longer to dry. Both options offer great benefits, so the choice depends on your needs for protection and time available.
Professional Disclaimer
This guide provides general information for educational purposes. Floor conditions, materials, and local building standards vary. When in doubt, consult a licensed flooring professional.
Conclusion
Refinishing hardwood floors is a cost-effective way to restore their beauty, durability, and value. With the right preparation and technique, many homeowners can achieve professional-looking results, while severely damaged or thin floors may benefit from professional refinishing for the best long-term outcome. Homeowners considering replacement instead of restoration should explore hardwood flooring choices designed for kitchen spaces before making a final decision. Link: Best Hardwood Flooring for Kitchens
Refinished floors can improve your home’s appearance, increase resale value, and extend the life of your flooring. Most projects are affordable compared to replacement, and services can be customized to match your floor’s condition, whether it needs a light refresh or a complete restoration. For a broader comparison of materials, costs, and performance, review our guide to modern kitchen floor solutions before starting your next renovation.
About Kitchenoro
Kitchenoro is your trusted partner for complete kitchen remodeling, renovation, and elegant design. We specialize in premium cabinet installation, countertops, and transforming kitchens into luxurious, functional spaces. With expert craftsmanship and tailored solutions, Kitchenoro turns your vision into reality. Contact us to elevate your kitchen’s style and functionality!