
If you’re searching for how to install backsplash, you’re probably looking for a way to upgrade your kitchen without spending thousands of dollars on professional labor. Many homeowners hesitate to start a backsplash project because they worry about cutting tiles incorrectly, choosing the wrong adhesive, creating uneven grout lines, or ending up with a backsplash that looks crooked. These concerns are completely normal, especially if you’ve never installed tile before. I remember helping with my first backsplash installation and feeling overwhelmed by all the tools, measurements, and materials involved. At the time, I thought laying the tile would be the hardest part, but I quickly learned that careful planning and preparation were what truly determined the final result.
Over the years, I’ve learned that backsplash installation is much more beginner-friendly than most people expect. In fact, some of the best-looking projects I’ve worked on were completed by homeowners with little to no previous tile experience. One project taught me the value of patience when a simple dry layout prevented several awkward tile cuts near cabinets and outlets. Another showed how taking extra time to level the first row made the entire backsplash look professionally installed. In this guide, you’ll learn exactly how to install backsplash step by step, from measuring and planning to grouting and sealing, so you can avoid common mistakes, save money, and achieve results you can be proud of.
How to Install Backsplash- Quick Answer:
How to install backsplash: Start by measuring the wall, preparing the surface, and planning your tile layout. Apply tile adhesive, install the tiles using spacers, then allow the adhesive to cure before grouting. Finish by sealing the grout if needed and applying silicone caulk along expansion gaps for a durable, professional-looking backsplash.
Quick Project Snapshot
| Skill Level | Beginner to Intermediate |
| Time Required | 1–2 Days |
| Estimated DIY Cost | $150–$600 |
| Difficulty Level | Moderate |
| Best Tile for Beginners | Ceramic Subway Tile |
| Grouting Required | Yes (Except Peel-and-Stick) |
| Professional Cost | $600–$2,000+ |
Key Takeaways
-
- Installing a backsplash is a beginner-friendly DIY project.
-
- Proper wall preparation is essential for a successful installation.
-
- Planning the tile layout helps create a professional finish.
-
- Most backsplash projects can be completed within one to two days.
-
- Buying extra tile helps prevent delays and future repair issues.
-
- Grouting and sealing help protect your backsplash for years.
Why Many Homeowners Choose DIY Backsplash Installation
One of the biggest reasons homeowners learn how to install backsplash is to save money. Professional backsplash installation can cost hundreds or even thousands of dollars depending on the kitchen size and tile material.
A DIY backsplash project allows you to improve the appearance of your kitchen while reducing labor costs. Many homeowners are surprised to learn that backsplash installation is often more about patience and planning than advanced construction skills.
If you can measure accurately, follow instructions, and take your time, you can achieve professional-looking results without hiring a contractor.
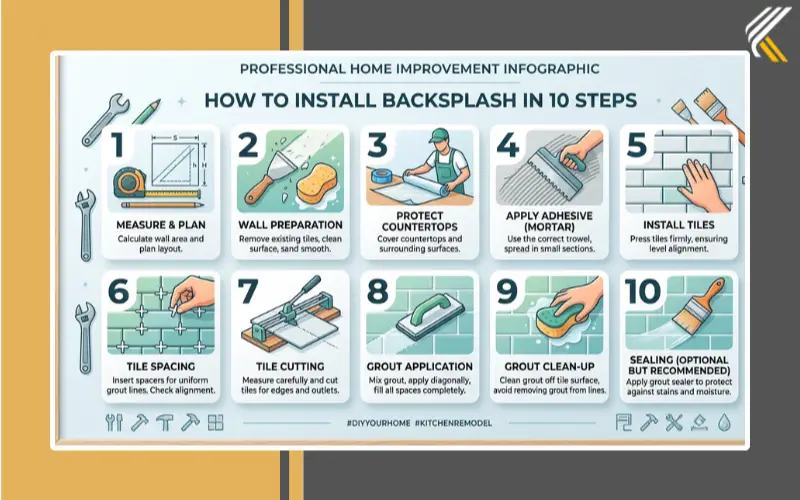
How to Install Backsplash in 10 Simple Steps
- Measure the backsplash area.
- Calculate tile quantity and purchase materials.
- Prepare and clean the wall surface.
- Plan the tile layout.
- Install a ledger board if needed.
- Cut tiles for outlets, corners, and edges.
- Apply tile adhesive.
- Install the tiles using spacers.
- Grout and clean the tile surface.
- Seal grout and apply silicone caulk to expansion gaps.
This quick overview provides a simple roadmap before starting the full installation process.
What Is a Backsplash?
A backsplash is the protective surface installed on the wall between the countertop and upper cabinets. It prevents water damage, grease buildup, and food stains while improving the appearance of the kitchen.
Popular backsplash materials include:
-
- Ceramic tile
-
- Porcelain tile
-
- Glass tile
-
- Mosaic tile
-
- Natural stone
-
- Metal tile
-
- Peel-and-stick tile
Before choosing a material, explore your Kitchen Backsplash pillar guide to compare styles, designs, and installation requirements.
Is Installing a Backsplash a Good DIY Project?
Many homeowners wonder if they can install a backsplash without professional help.
The answer is yes.
Most backsplash projects require careful measuring and patience rather than advanced construction skills.
| Factor | Details |
|---|---|
| Skill Level | Beginner to Intermediate |
| Difficulty | Moderate |
| Time Required | 1–2 Days |
| Cost Savings | High |
| Special Tools Needed | Tile Cutter or Wet Saw |
If you are comfortable using basic hand tools and following step-by-step instructions, a DIY backsplash project is achievable.
Who Should Install a Backsplash Themselves?
A backsplash project is a great choice if you:
-
- Want to update your kitchen on a budget
-
- Enjoy DIY home improvement projects
-
- Want to avoid contractor labor costs
-
- Have basic measuring skills
-
- Are comfortable using simple tools
You may want professional help if your project involves complex layouts, expensive materials, or extensive wall repairs.
How Much Does It Cost to Install a Backsplash?
The total cost depends on the backsplash material, kitchen size, and whether you install it yourself or hire a contractor.
| Expense | Average Cost |
|---|---|
| Ceramic Tile | $5–$15 per sq. ft. |
| Porcelain Tile | $8–$20 per sq. ft. |
| Glass Tile | $10–$30 per sq. ft. |
| Thinset Adhesive | $15–$40 |
| Grout | $10–$50 |
| Tile Spacers | $5–$15 |
| Wet Saw Rental | $40–$80 per day |
| DIY Installation | $150–$600 |
| Professional Installation | $600–$2,000+ |
Material costs vary significantly depending on the style you choose. Our Kitchen Backsplash guide compares popular materials and design options to help you plan your budget.
DIY vs Professional Installation Cost
Many homeowners choose DIY backsplash installation because of the potential savings.
| Installation Method | Typical Cost |
|---|---|
| DIY Installation | $150–$600 |
| Professional Installation | $600–$2,000+ |
Depending on the project size, installing a backsplash yourself can save several hundred dollars in labor costs.
How Long Does It Take to Install a Backsplash?
The timeline depends on the size of the project and your experience level.
| Project Size | Estimated DIY Time |
|---|---|
| Small Backsplash | 4–6 Hours |
| Medium Kitchen | 1–2 Days |
| Large Kitchen | 2–3 Days |
Keep in mind that drying and curing times for adhesive and grout are not included in these estimates.
Choosing the Right Backsplash Material
The material you choose affects installation difficulty, maintenance, durability, and overall cost.
| Material | Advantages | Disadvantages |
|---|---|---|
| Ceramic Tile | Affordable and easy to install | Can chip |
| Porcelain Tile | Durable and water resistant | Harder to cut |
| Glass Tile | Modern appearance | More expensive |
| Natural Stone | Unique and luxurious | Requires sealing |
| Mosaic Tile | Decorative and versatile | More grout lines |
| Peel-and-Stick Tile | Easy installation | Less durable |
Selecting the right material before installation can save time and reduce future maintenance. When selecting tile materials, it can be helpful to review guidance from the Tile Council of North America (TCNA), which publishes industry standards and best practices for tile installation and maintenance.
Backsplash Material Comparison
| Material | Installation Difficulty | Maintenance | Cost |
|---|---|---|---|
| Ceramic Tile | Easy | Low | $$ |
| Porcelain Tile | Moderate | Low | $$$ |
| Glass Tile | Moderate | Low | $$$$ |
| Natural Stone | Advanced | High | $$$$ |
| Peel-and-Stick | Very Easy | Low | $$ |
Tools You’ll Need
Gather all tools before starting the project.
| Tool | Purpose |
|---|---|
| Tape Measure | Measure wall dimensions |
| Pencil | Mark layout lines |
| Level | Keep tile rows straight |
| Tile Cutter or Wet Saw | Cut tiles accurately |
| Notched Trowel | Spread adhesive |
| Tile Spacers | Maintain even grout lines |
| Grout Float | Apply grout |
| Sponge | Remove excess grout |
| Caulk Gun | Apply silicone caulk |
| Safety Glasses | Protect your eyes |
Having all tools available before starting helps avoid interruptions during installation.
Materials You’ll Need
Prepare all materials before beginning.
-
- Backsplash tiles
-
- Thinset mortar or tile adhesive
-
- Grout
-
- Silicone caulk
-
- Tile spacers
-
- Ledger board (optional)
-
- Grout sealer (if required)
Purchase extra tile to cover mistakes, cuts, and future repairs.
How to Measure for a Backsplash and Calculate Tile Quantity
Before purchasing tile, determine how much material you’ll need.
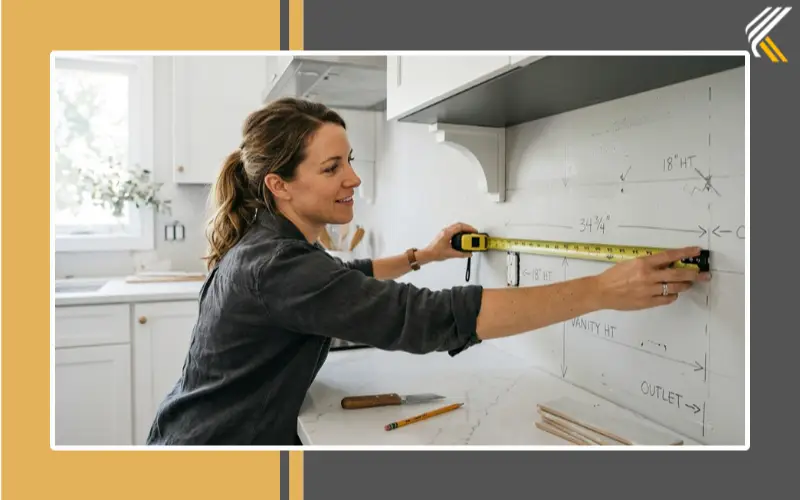
Step 1: Measure the Length
Measure the total width of the backsplash area.
Step 2: Measure the Height
Measure from the countertop to the desired backsplash height.
Step 3: Calculate Square Footage
Use this formula:
Length × Height = Square Footage
Example:
-
- Length = 12 feet
-
- Height = 1.5 feet
12 × 1.5 = 18 square feet
Step 4: Add Extra Tile
Always buy additional tile for cuts and breakage.
| Project Type | Extra Tile Recommended |
|---|---|
| Straight Layout | 10% |
| Diagonal Layout | 15% |
| Mosaic Tile | 15–20% |
The backsplash height you choose affects the total tile quantity required. Refer to our Kitchen Backsplash Height guide for sizing recommendations and design considerations.
Personal Experience: Buying Extra Tile Saved My Project
During one backsplash tile installation, I carefully calculated the square footage and purchased exactly the amount of tile required. Unfortunately, several tiles cracked while being cut around outlets and corners. I ended up making an emergency trip back to the store, only to find that the tile batch had sold out.
Since then, I always purchase at least 10–15% extra tile. The additional cost is small compared to the frustration of stopping a project halfway through because you run out of material.
Prepare the Area
Preparation is one of the most important parts of backsplash tile installation.
Clear the countertop completely.
Remove:
-
- Small appliances
-
- Decorations
-
- Dish racks
-
- Kitchen accessories
Cover countertops with cardboard or protective sheets to prevent damage.
Turn off electricity to outlets and switches located within the installation area.
Remove outlet covers and switch plates before beginning.
A clean workspace makes installation safer and more efficient.
Prepare the Wall
A backsplash performs best when installed on a clean, smooth surface.
The wall should be:
-
- Dry
-
- Clean
-
- Flat
-
- Free from grease
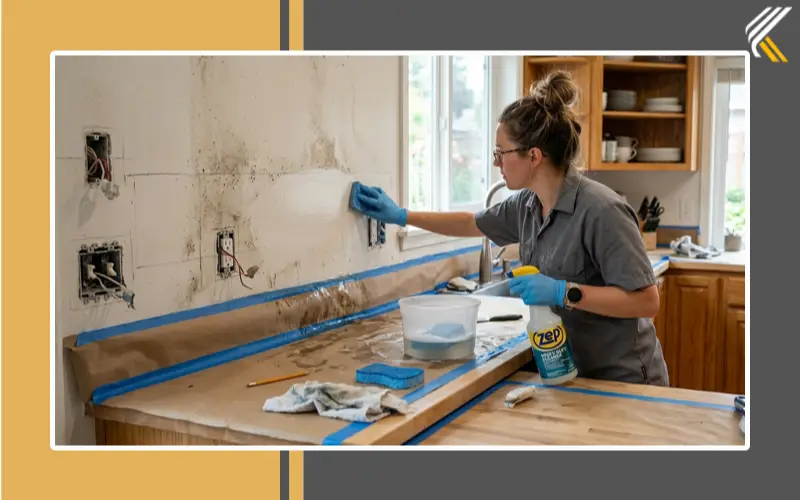
Wash the wall thoroughly if grease or cooking residue is present.
Fill any holes or damaged areas with wall filler.
Sand rough spots until smooth.
Proper wall preparation improves adhesive strength and helps prevent future tile failures.
The wall should be clean, dry, and free from grease before installation. The National Association of Home Builders (NAHB) emphasizes that proper surface preparation is one of the most important factors in achieving durable and long-lasting renovation results.
Can You Install Backsplash Over Painted Drywall?
Yes.
Most backsplash installations can be completed directly over painted drywall if the paint is firmly attached and in good condition.
Lightly sanding glossy paint can improve adhesion.
Can You Install Tile Over Existing Tile?
Yes, in some situations.
The existing tile must be:
-
- Securely attached
-
- Clean
-
- Free from cracks
-
- Relatively flat
Many professionals still recommend removing old tile when possible for the best long-term results.
Personal Experience: Cleaning the Wall Made a Bigger Difference Than Expected
While helping with a kitchen renovation, I noticed that a section of tile wasn’t bonding as well as the rest of the backsplash. After removing the tile, we discovered a thin layer of cooking grease had been left on the wall near the stove.
After thoroughly cleaning the surface and reapplying adhesive, the tiles bonded properly. That experience taught me that wall preparation is not just a recommendation—it is one of the most important steps in backsplash installation.
Install a Ledger Board
A ledger board provides temporary support for the first row of tile.
This step is especially useful when countertops are not perfectly level.
Use a level to draw a horizontal reference line across the wall.
Attach the ledger board directly below the line.
The board keeps tiles straight and prevents them from sliding while the adhesive cures.
Plan the Tile Layout
Many installation mistakes occur because homeowners skip this step.
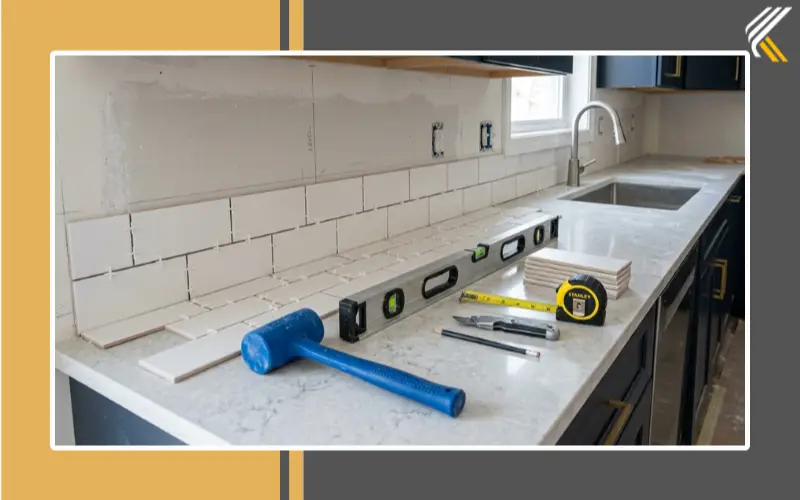
Before applying adhesive, perform a dry layout.
Place tiles on the countertop and visualize the pattern.
Why Layout Planning Matters
Proper planning helps:
-
- Avoid narrow edge cuts
-
- Create balanced spacing
-
- Improve symmetry
-
- Produce a professional appearance
Find the center point of the backsplash area and work outward.
Adjust the layout if necessary to ensure cut tiles on both sides remain similar in size.
Consider Kitchen Backsplash Height
Backsplash height affects both design and material requirements.
Standard backsplashes are often 4 inches tall, while full-height backsplashes extend from the countertop to the upper cabinets.
Choosing the correct height before installation helps ensure accurate material calculations and a balanced appearance.
Common Concerns Before Installing a Backsplash
Many first-time DIYers worry about:
-
- Cutting tiles incorrectly
-
- Creating uneven grout lines
-
- Choosing the wrong adhesive
-
- Wasting expensive tile
-
- Installing crooked rows
These concerns are normal. The good news is that most backsplash mistakes can be avoided with proper planning, careful measuring, and patience throughout the installation process.
Personal Experience: A Dry Layout Prevented a Major Mistake
On one project, I almost started installing tile immediately after mixing the thinset. Fortunately, I decided to perform a quick dry layout first.
The layout revealed that one side of the backsplash would have ended with a tiny one-inch tile strip near a cabinet. By adjusting the starting point slightly, both ends of the backsplash finished with balanced cuts and a much cleaner appearance.
That small planning step completely changed the final result.
Cut the Tiles
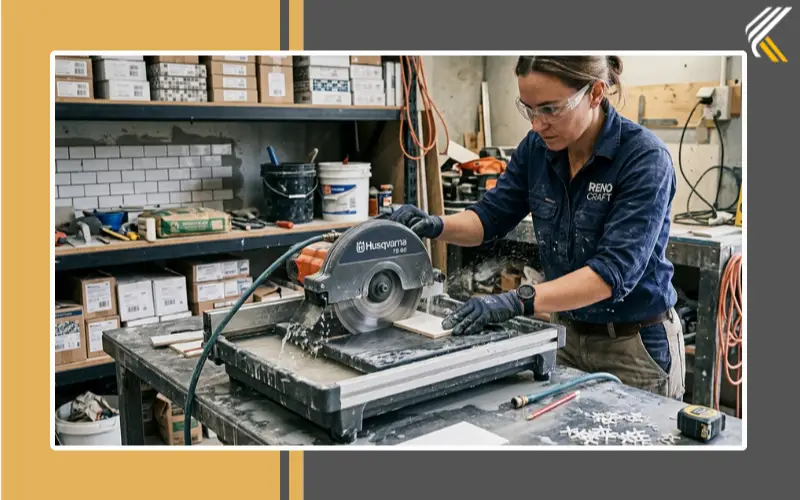
Most backsplash projects require tile cutting around:
-
- Outlets
-
- Corners
-
- Windows
-
- Cabinet edges
Measure carefully before cutting.
Remember:
Measure twice, cut once.
For straight cuts, a manual tile cutter often works well.
For detailed cuts around outlets and corners, a wet saw provides greater accuracy.
Always wear safety glasses while cutting tile.
Mix and Apply Adhesive
Once your layout is finalized, you can begin applying adhesive.
Choose an adhesive that matches your tile type.
Choosing the Right Adhesive
| Tile Type | Recommended Adhesive |
|---|---|
| Ceramic Tile | Thinset Mortar |
| Porcelain Tile | Modified Thinset |
| Glass Tile | White Thinset |
| Stone Tile | Premium Thinset |
Apply adhesive in small sections using a notched trowel.
Hold the trowel at approximately a 45-degree angle.
The ridges created by the trowel improve adhesion and help achieve consistent tile coverage.
Avoid spreading adhesive over large areas at once because it can begin drying before tiles are installed.
Install the Tile
Now it is time to install the backsplash tile.
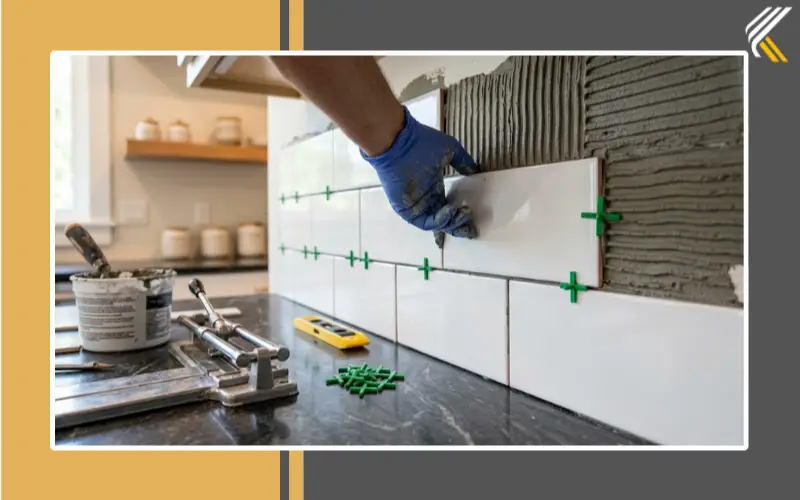
Begin placing tiles onto the adhesive using the layout you planned earlier.
Press each tile firmly into the adhesive while giving it a slight twisting motion. This helps create a strong bond between the tile and the wall.
Insert tile spacers between tiles to maintain consistent grout lines.
Work in small sections and check your progress often with a level.
Tips for Professional Results
-
- Start from the center and work outward.
-
- Use spacers throughout the project.
-
- Check alignment every few rows.
-
- Remove excess adhesive immediately.
-
- Keep grout joints consistent.
Step back occasionally and inspect the overall layout. Small adjustments are much easier before the adhesive begins to set.
How to Install Backsplash Around Outlets and Switches
Cutting tile around outlets is often the most challenging part of backsplash installation.
Before starting:
-
- Turn off power at the breaker.
-
- Confirm electricity is off.
-
- Remove outlet covers and switch plates.
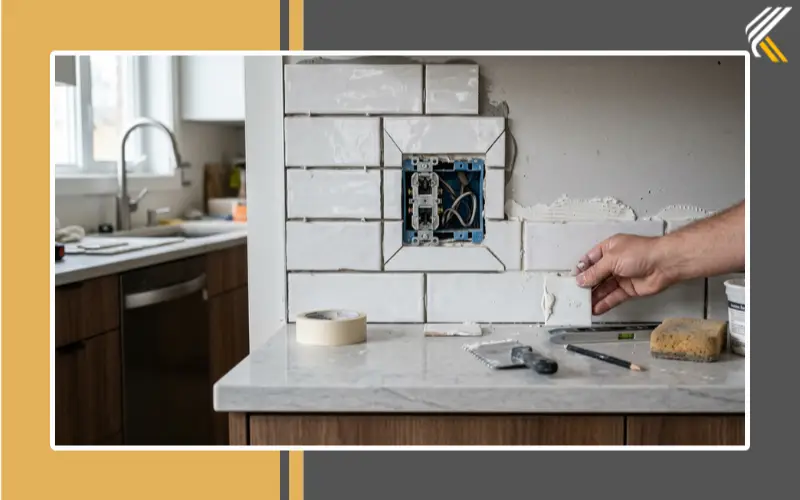
Measure the outlet location carefully and transfer those measurements to the tile.
Use a wet saw or tile nippers to make the necessary cuts.
Pro Tip
Leave a small gap around outlet openings.
The cover plate will hide minor gaps and provide a cleaner finished appearance.
If the new tile causes outlets to sit too deep in the wall, install outlet extenders to bring them flush with the backsplash surface.
Personal Experience: Outlet Cuts Took Longer Than Expected
The first time I installed a kitchen tile backsplash, I assumed laying the tile would be the hardest part. Instead, measuring and cutting around outlets required the most patience.
Some outlet openings took three separate measurements before I felt confident making the cut. Taking extra time prevented wasted tile and helped create a professional-looking finish around every electrical box.
How to Install a Mosaic Tile Backsplash
Mosaic tile backsplashes usually come attached to mesh-backed sheets.
These sheets simplify installation but require careful alignment.
Step 1: Dry Fit the Sheets
Lay the sheets out before applying adhesive.
Check how the joints align between sheets.
Step 2: Apply Adhesive
Spread thinset onto a small section of the wall.
Avoid covering large areas at once.
Step 3: Install the Sheets
Press each sheet firmly into the adhesive.
Use even pressure across the entire sheet.
Step 4: Adjust Individual Tiles
If necessary, reposition loose tiles before the adhesive cures.
The goal is to make the joints between sheets look identical to the joints within each sheet.
How to Install a Peel-and-Stick Backsplash
Peel-and-stick backsplashes are popular among beginners because they require fewer tools and less installation time.
Step 1: Clean the Surface
Remove grease, dust, and debris from the wall.
Step 2: Mark Reference Lines
Use a level to draw straight guidelines.
Step 3: Peel the Backing
Remove part of the backing paper.
Step 4: Install the Tile
Press the tile firmly onto the wall.
Smooth out air bubbles as you work.
Step 5: Trim Edges
Use a utility knife to cut around outlets, corners, and cabinets.
Most peel-and-stick products do not require grout or sealing.
Allow the Adhesive to Cure
After all tiles have been installed, allow the adhesive to cure completely.
Most manufacturers recommend waiting at least 24 hours before grouting.
Avoid touching or disturbing the tiles during this period.
Proper curing helps prevent tile movement and installation failures.
Apply the Grout
Once the adhesive has cured, remove all tile spacers.
Mix the grout according to the manufacturer’s instructions.
Using a grout float, spread grout diagonally across the tile surface.
Push grout firmly into every joint.
Work in manageable sections to maintain control.
Grouting Tips
-
- Fill every joint completely.
-
- Hold the grout float at a 45-degree angle.
-
- Remove excess grout as you work.
-
- Do not allow grout to fully dry on the tile surface.
Consistent grout lines contribute significantly to the finished appearance of the backsplash.
Personal Experience: Working in Smaller Sections Improved the Finish
During one backsplash installation, I tried grouting the entire wall at once to save time. By the time I started cleaning, part of the grout had already begun to harden on the tile surface.
On future projects, I switched to grouting smaller sections one at a time. The cleanup process became much easier, and the finished grout lines looked cleaner and more consistent.
Clean Excess Grout
Wait approximately 15 to 30 minutes after applying grout.
A haze will begin to form on the tile surface.
Use a damp sponge to gently wipe away excess grout.
Rinse the sponge frequently in clean water.
Avoid using too much water because excessive moisture can weaken fresh grout.
After several hours, polish any remaining haze with a microfiber cloth.
Seal the Grout
Many cement-based grouts benefit from sealing.
A grout sealer helps protect against:
-
- Moisture
-
- Food stains
-
- Grease
-
- Mold growth
Apply the sealer according to the manufacturer’s instructions.
Depending on the product used, resealing may be required every one to three years.
Fill Expansion Gaps
The small gap between the countertop and backsplash should not be filled with grout.
Instead, use flexible silicone caulk.
Silicone allows for normal expansion and contraction that occurs with temperature changes and house movement.
Choose a color that closely matches the grout or countertop for a seamless appearance.
How to Install Backsplash on Uneven Countertops
Many kitchens have countertops that are slightly out of level.
Installing tile directly from the countertop can make the entire backsplash look crooked.
Step 1: Find the Lowest Point
Use a level to identify the lowest section of the countertop.
Step 2: Draw a Level Reference Line
Mark a perfectly level line on the wall above the countertop.
Step 3: Install a Ledger Board
Attach a temporary ledger board below the line.
Step 4: Begin Tiling from the Reference Line
Use the line rather than the countertop as your guide.
Step 5: Trim the Bottom Row
After installation, cut the bottom row to follow the countertop profile.
This technique creates a professional appearance even when countertops are uneven.
Common Backsplash Installation Mistakes to Avoid
| Mistake | Potential Result |
|---|---|
| Skipping Wall Preparation | Poor Tile Adhesion |
| Not Planning the Layout | Uneven Appearance |
| Using Incorrect Adhesive | Tile Failure |
| Grouting Too Early | Weak Grout Joints |
| Forgetting Tile Spacers | Uneven Grout Lines |
| Buying Exact Tile Quantity | Project Delays |
Common Backsplash Problems and Solutions
Even experienced DIYers encounter challenges.
Here are some common backsplash installation problems and how to solve them.
Tile Slipping Down the Wall
Cause: Excess adhesive or inadequate support.
Solution: Use tile spacers and a ledger board.
Uneven Grout Lines
Cause: Inconsistent spacing.
Solution: Use spacers and check alignment frequently.
Loose Tiles
Cause: Dirty walls or poor adhesive coverage.
Solution: Remove the tile and reinstall it using fresh adhesive.
Cracked Grout
Cause: Movement or improper curing.
Solution: Remove damaged grout and apply new grout.
Uneven Tile Edges (Lippage)
Cause: Uneven walls or inconsistent tile placement.
Solution: Check tile alignment frequently and adjust before the adhesive cures.
What Makes a Backsplash Look Professional?
The best-looking backsplash installations are not always the most expensive.
Professional results usually come from:
-
- Straight tile rows
-
- Consistent grout lines
-
- Accurate outlet cuts
-
- Balanced tile layouts
-
- Clean finishing details
Focusing on these areas will often have a bigger impact than choosing premium materials.
Pro Tips for a Professional-Looking Backsplash
These simple tips can improve the final result.
-
- Dry-fit tiles before applying adhesive.
-
- Buy extra tile for repairs and mistakes.
-
- Use a laser level when possible.
-
- Work in small adhesive sections.
-
- Clean grout haze early.
-
- Measure outlet locations twice before cutting.
-
- Keep grout joints consistent.
-
- Allow adhesive and grout to cure fully.
-
- Save leftover tile for future repairs.
Small details often make the biggest difference in the finished project.
Personal Experience: Working Around an Uneven Countertop
During a backsplash installation project, I discovered that the countertop was nearly one-quarter inch out of level from one side to the other.
Starting directly from the countertop would have caused the tile rows to appear crooked.
Instead, I installed a temporary ledger board and worked from a perfectly level reference line.
After trimming the bottom row to match the countertop profile, the finished backsplash looked completely level.
This experience reinforced the importance of planning before installing the first tile.
Another Lesson Learned From My First Backsplash Project
During my first backsplash tile installation, I expected placing tile to take the most time.
I quickly learned that measuring and cutting tiles around outlets, corners, and cabinet edges required far more attention.
Taking extra time to measure accurately reduced waste and improved the final appearance.
Since then, I always allow additional time for tile cutting and fitting.
Backsplash Maintenance Tips
A backsplash requires very little maintenance when installed correctly.
To keep it looking its best:
-
- Clean spills promptly.
-
- Wipe surfaces regularly with mild soap and water.
-
- Avoid abrasive cleaning products.
-
- Inspect grout annually.
-
- Reapply grout sealer when needed.
-
- Replace damaged caulk if necessary.
Routine maintenance helps extend the life of your backsplash.
✓ Final Backsplash Installation Checklist
- Measured the backsplash area accurately
- Purchased 10–15% extra tile
- Cleaned and prepared the wall surface
- Planned the tile layout
- Used the correct tile adhesive
- Installed tile spacers consistently
- Allowed adhesive to cure fully
- Applied grout correctly
- Sealed grout if required
- Applied silicone caulk at expansion gaps
- Reinstalled outlet covers
- Removed grout haze from tile surfaces
Frequently Asked Questions
Can I install a backsplash myself?
Yes. Most homeowners can successfully complete a DIY backsplash installation with basic tools and careful planning.
Do I need backer board for a kitchen backsplash?
In most kitchens, drywall is sufficient as long as it is clean, dry, and in good condition.
Can I tile directly over painted drywall?
Yes. Lightly sanding glossy paint can improve adhesion.
Should a backsplash sit directly on the countertop?
No. Leave a small gap and fill it with silicone caulk.
How much gap should I leave between the countertop and backsplash?
Approximately 1/8 inch is common.
Can I install a backsplash without removing countertops?
Yes. Most backsplash projects are installed after countertops are already in place.
How long should thinset dry before grouting?
Most manufacturers recommend waiting at least 24 hours.
Do I need to seal backsplash grout?
Many cement-based grouts benefit from sealing, although some modern grout products do not require it.
What is the easiest backsplash to install?
Peel-and-stick backsplash products are generally the easiest option for beginners.
How long does a tile backsplash last?
A properly installed tile backsplash can last for several decades with proper maintenance.
The Value of Learning Basic Home Improvement Skills
Installing a backsplash is more than a kitchen upgrade. It is also an opportunity to build confidence with DIY home improvement projects.
Many homeowners begin with a backsplash and later take on larger renovation projects because the experience helps them develop valuable measuring, planning, and installation skills.
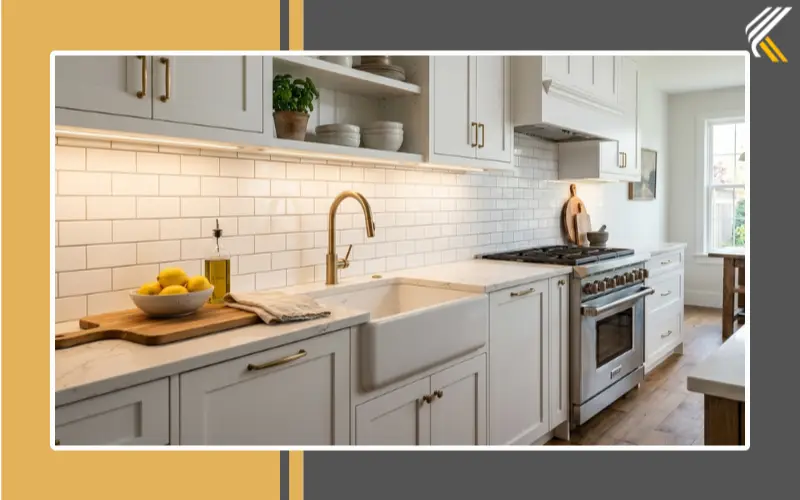
Conclusion
Learning how to install backsplash is one of the most rewarding kitchen improvement projects a homeowner can complete. A well-installed backsplash not only protects your walls from moisture, grease, and everyday kitchen messes, but it also enhances the overall appearance of your space and can even increase your home’s value. While many first-time DIYers worry about making mistakes, my experience has shown that successful backsplash installations are rarely about advanced skills. Instead, they come down to careful preparation, accurate measurements, and patience throughout the process. Some of the best results I’ve seen came from taking extra time to plan the layout, double-check cuts around outlets, and ensure the first row was perfectly level before moving forward.
The key to success is preparation. Measuring accurately, planning the layout, choosing the right materials, and following each installation step carefully will help you achieve professional-looking results. Before selecting materials, explore our complete Kitchen Backsplash guide to compare styles, colors, and design ideas. If you are still deciding on dimensions, our Kitchen Backsplash Height guide can help you choose the right height for your kitchen layout. With the proper tools, quality materials, and a little patience, you can complete a backsplash installation that looks great and performs well for many years. For additional information about kitchen remodeling best practices and home improvement planning, homeowners can explore resources from the National Kitchen & Bath Association (NKBA). By approaching the project with confidence and following proven installation practices, you can create a backsplash that not only looks professional but also provides lasting value and protection for your kitchen.
About Kitchenoro
Kitchenoro is your trusted partner for complete kitchen remodeling, renovation, and elegant design. We specialize in premium cabinet installation, countertops, and transforming kitchens into luxurious, functional spaces. With expert craftsmanship and tailored solutions, Kitchenoro turns your vision into reality. Contact us to elevate your kitchen’s style and functionality!